Berry Blast Frozen Yogurt Cups
Highlighted under: Homemade Sweets Recipes
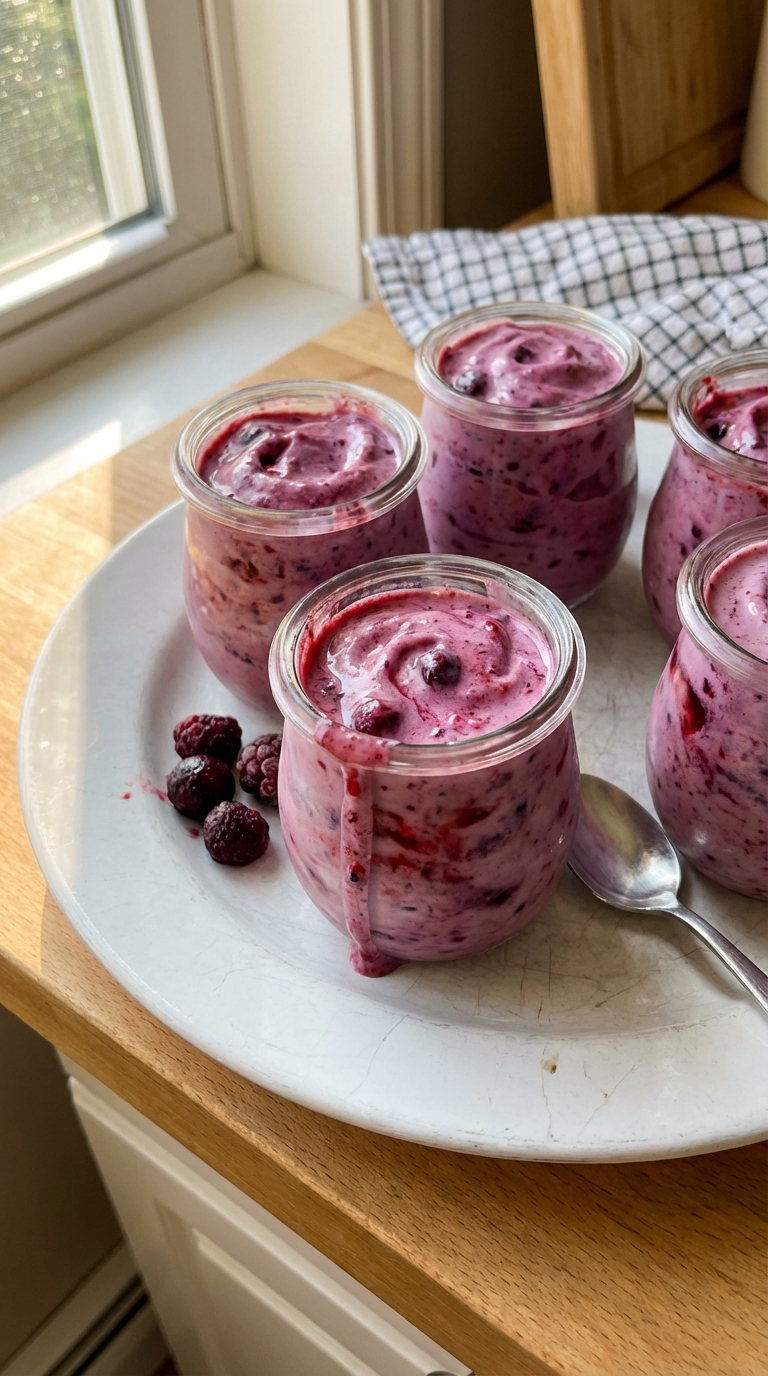
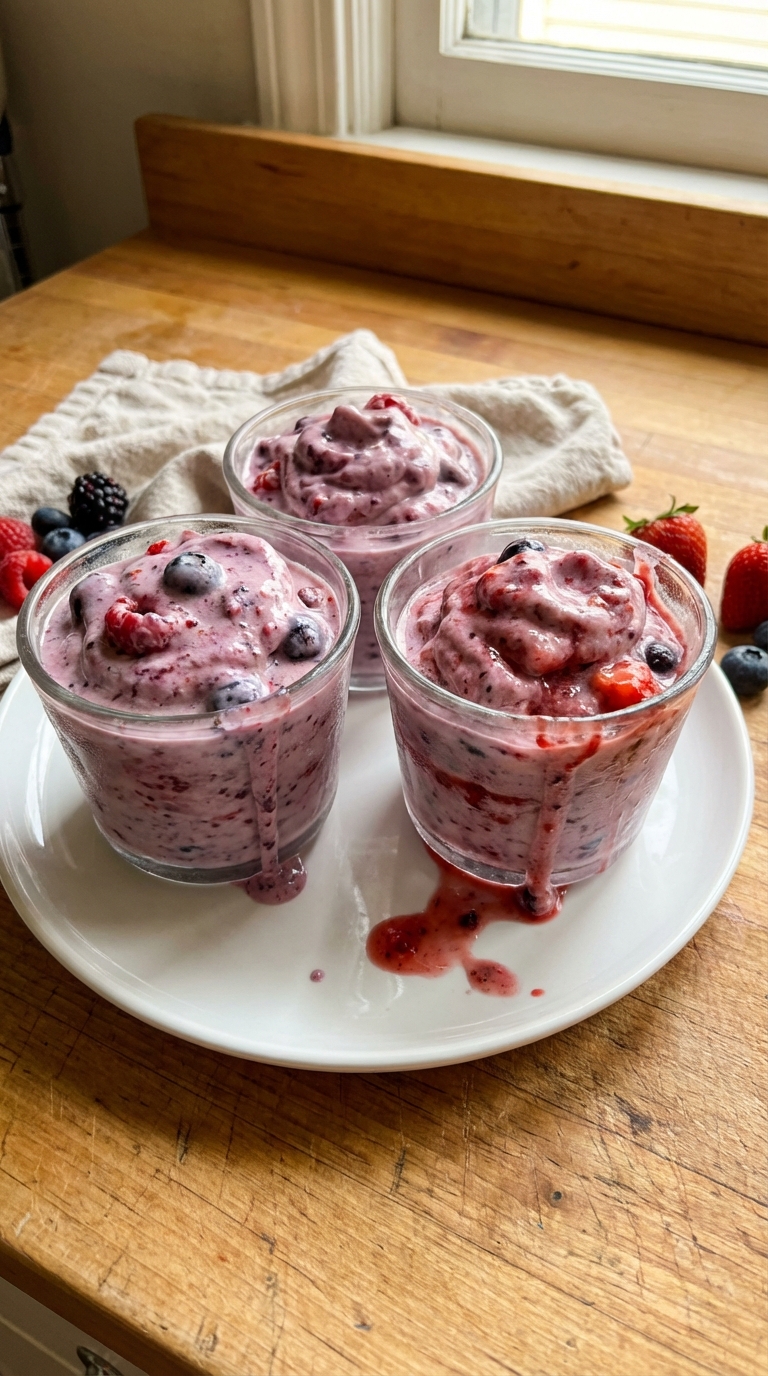
I absolutely love making Berry Blast Frozen Yogurt Cups during the hot summer months. They are not only refreshing but also quick to prepare, making them a perfect snack for warm days. The combination of mixed berries and creamy yogurt creates a delightful treat that feels indulgent but is actually quite healthy. Plus, I enjoy customizing them with my favorite berries, which adds a personal touch. These cups are great for enjoying alone or sharing with friends at gatherings, and they always bring a smile!
When I first created these Berry Blast Frozen Yogurt Cups, I was looking for a healthy dessert that would satisfy my sweet tooth without derailing my diet. The blend of yogurt and berries not only tastes amazing but also packs a nutritious punch!
By experimenting with different yogurt types, I discovered that using Greek yogurt gives a creamier texture and makes the cups more filling. You can even add a splash of honey for extra sweetness. Trust me, once you've made these, you'll never go back to store-bought treats!
Why You'll Love This Recipe
- Refreshing and fruity flavor that bursts with berries
- Creamy texture that balances perfectly with the crunchy crust
- Healthy alternative to ice cream that everyone will enjoy
Perfecting the Yogurt Blend
When mixing your yogurt filling, it’s important to select a high-quality Greek yogurt. The thickness of Greek yogurt provides a rich, creamy texture that complements the fruit beautifully. If you prefer a slightly lighter version, you can mix half Greek yogurt and half regular yogurt for a balanced texture. Just be sure to mix until smooth for an even distribution of the berries throughout the filling.
Incorporating the mixed berries adds a delightful burst of flavor to each cup. Consider using fresh berries for the best taste, but frozen berries are a great alternative if fresh ones aren't available. If using frozen, allow them to thaw slightly before mixing to avoid excess liquid. This helps maintain the creamy consistency of your yogurt and ensures your cups set beautifully in the freezer.
Crafting the Crust
The crust for your frozen yogurt cups can be easily adjusted based on your preferences. While granola provides nice crunch and flavor, you can swap it with crushed cookies or nut-based mixtures for a different taste profile. If you're looking for a gluten-free option, choose certified gluten-free granola or use ground almonds combined with coconut flakes instead.
Press the crust mixture firmly into the silicone molds. This step is crucial as it will hold the yogurt filling without crumbling. You can use the back of a tablespoon or your fingers to ensure it's compact. If the granola mixture feels too dry, a small extra drizzle of melted coconut oil can help hold it together better during freezing.
Ingredients
For the Yogurt Cups
- 2 cups Greek yogurt
- 1 cup mixed berries (strawberries, blueberries, raspberries)
- 2 tablespoons honey (optional)
- 1 teaspoon vanilla extract
For the Crust
- 1 cup granola
- 2 tablespoons coconut oil, melted
- 1 tablespoon brown sugar
Instructions
Prepare the Crust
In a bowl, combine the granola, melted coconut oil, and brown sugar until mixed well. Press the mixture into the bottom of silicone cupcake molds to form a base.
Mix the Yogurt Filling
In another bowl, stir together the Greek yogurt, mixed berries, honey (if using), and vanilla extract until well combined.
Assemble the Cups
Spoon the yogurt mixture over the crust in each mold until full. Tap gently to remove any air bubbles.
Freeze
Place the molds in the freezer for at least 4 hours or until completely firm.
Serve
Once frozen, pop the yogurt cups out of the molds and enjoy immediately!
Pro Tips
- For added flavor, feel free to mix in some chia seeds or top with sliced fresh fruit just before serving.
Serving and Enjoying
These Berry Blast Frozen Yogurt Cups are versatile and can be served in various ways. For a fun twist, consider topping them with additional fresh berries, a sprinkle of shredded coconut, or a drizzle of chocolate sauce right before serving. This adds an extra layer of flavor and color, making them even more appetizing.
If you're planning to serve these yogurt cups at a gathering, consider preparing them a day in advance. They freeze well for up to a week, making them a perfect make-ahead treat. Just store them in an airtight container or wrap them individually in plastic wrap to maintain freshness.
Storage Tips
When storing frozen yogurt cups, it’s best to keep them in the molds until you're ready to serve them. This helps prevent freezer burn, which can affect the texture and flavor. If you've removed them from the molds, place them in a single layer in a freezer-safe container, separated by parchment paper to avoid sticking.
If you find that the yogurt cups are melting too quickly while serving, try keeping them in a cooler until it’s time to eat. The insulated environment will help maintain their temperature longer, allowing you to enjoy each delicious bite without rushing. This is especially helpful during outdoor events in the heat!
Questions About Recipes
→ Can I use different fruits?
Absolutely! You can use any combination of fruits you like. Just make sure they're fresh or properly thawed if they were frozen.
→ How do I store the leftover yogurt cups?
Store them in an airtight container in the freezer for up to one month.
→ Can I use regular yogurt instead of Greek yogurt?
Yes, but Greek yogurt provides a thicker texture that holds up better in the cups.
→ What if I want them sweeter?
You can increase the amount of honey or use flavored yogurt to add sweetness.
Berry Blast Frozen Yogurt Cups
Created by: The Ultimaterecipehub Team
Recipe Type: Homemade Sweets Recipes
Skill Level: Easy
Final Quantity: 4 servings
What You'll Need
For the Yogurt Cups
- 2 cups Greek yogurt
- 1 cup mixed berries (strawberries, blueberries, raspberries)
- 2 tablespoons honey (optional)
- 1 teaspoon vanilla extract
For the Crust
- 1 cup granola
- 2 tablespoons coconut oil, melted
- 1 tablespoon brown sugar
How-To Steps
In a bowl, combine the granola, melted coconut oil, and brown sugar until mixed well. Press the mixture into the bottom of silicone cupcake molds to form a base.
In another bowl, stir together the Greek yogurt, mixed berries, honey (if using), and vanilla extract until well combined.
Spoon the yogurt mixture over the crust in each mold until full. Tap gently to remove any air bubbles.
Place the molds in the freezer for at least 4 hours or until completely firm.
Once frozen, pop the yogurt cups out of the molds and enjoy immediately!
Extra Tips
- For added flavor, feel free to mix in some chia seeds or top with sliced fresh fruit just before serving.
Nutritional Breakdown (Per Serving)
- Calories: 180 kcal
- Total Fat: 8g
- Saturated Fat: 5g
- Cholesterol: 20mg
- Sodium: 50mg
- Total Carbohydrates: 24g
- Dietary Fiber: 3g
- Sugars: 10g
- Protein: 7g