Black Cocoa Cake: An Amazing Ultimate Recipe You Must Try
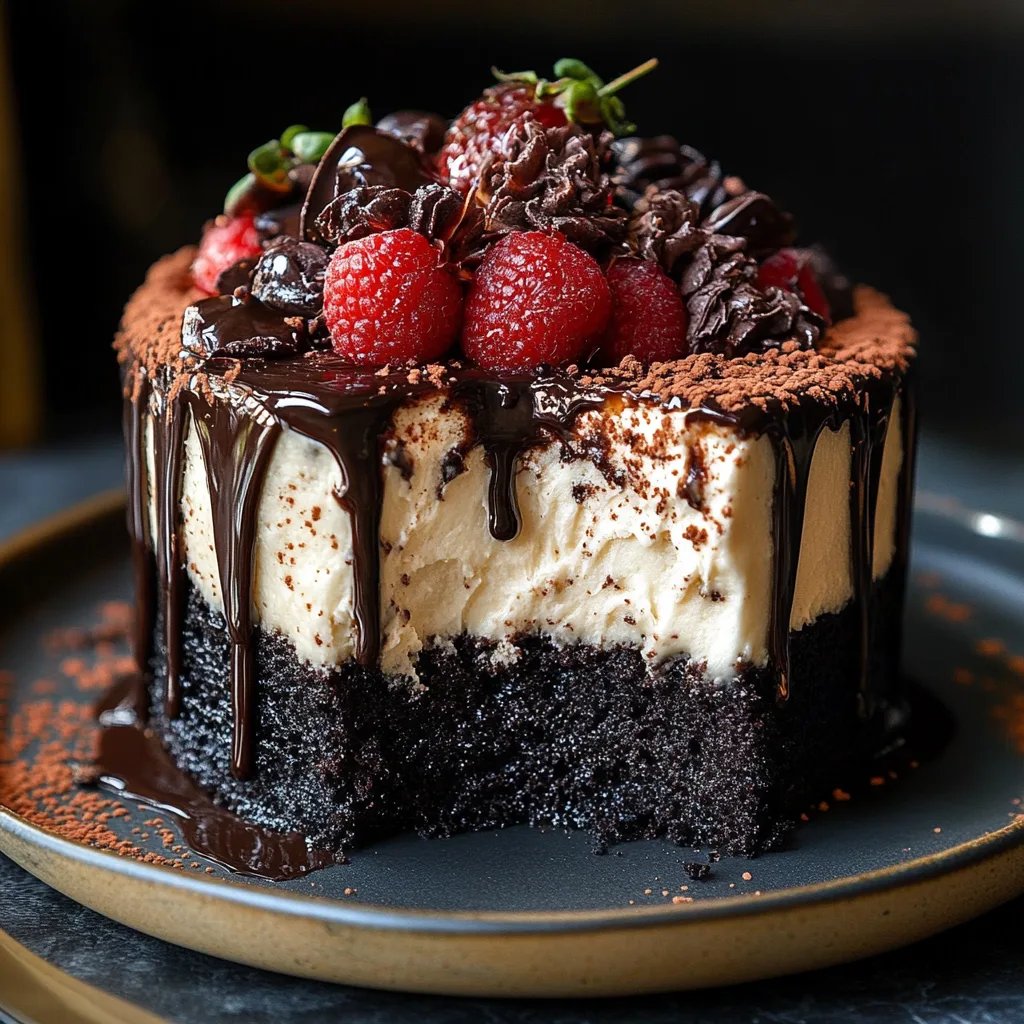
Black Cocoa Cake is an incredible dessert that elevates the classic chocolate cake to new heights. Its rich, dark color and intense flavor make it stand out from traditional chocolate cakes. Not only does it look stunning, but the taste is equally unforgettable. The deep, earthy flavor profile of black cocoa powder lends an indulgent quality that chocolate lovers will find irresistible.
If you've never tasted black cocoa before, you're in for a treat. Black cocoa has a unique quality that adds depth and complexity to baked goods, making this cake a true showstopper. The cake is moist, tender, and adorned with a velvety frosting that perfectly complements its depth. Whether for a special occasion or just a craving for something sweet, this cake promises to impress everyone who indulges in it.
In this guide, you’ll discover the secrets behind creating the perfect Black Cocoa Cake. We'll cover the reasons you’ll adore this recipe, as well as the preparation and cooking times. Additionally, you’ll find a comprehensive list of ingredients and step-by-step instructions to make this cake effortlessly. So, let's dive into the wonderful world of black cocoa baking!
Why You’ll Love This Recipe
Black Cocoa Cake offers an exciting twist on traditional recipes. Here are just a few reasons why this cake will capture your heart:
- Unique Flavor: The distinct flavor of black cocoa powder is unlike any other. It adds a bold richness that chocolate lovers will cherish.
- Eye-Catching Appearance: The dark, rich color of the cake makes it visually stunning and an excellent centerpiece for any event.
- Easy to Make: With simple instructions and easily obtainable ingredients, you don’t need to be a pro to nail this recipe.
- Versatile: This cake is wonderful on its own, but you can easily switch up the frosting or serve it with different toppings.
- Perfect for Any Occasion: Whether for birthdays, holidays, or casual gatherings, this cake fits seamlessly into any celebration.
- Satisfies Chocolate Cravings: If you're seeking that rich chocolate fix, this cake delivers in every bite.
With these qualities combined, it’s easy to see why Black Cocoa Cake has gained popularity. Once you serve it, your family and friends will be asking for your secret recipe!
Preparation and Cooking Time
Creating the Black Cocoa Cake will take approximately 1 hour and 30 minutes from start to finish. Here’s the breakdown of the time involved:
- Preparation Time: 20-25 minutes
- Cooking Time: 30-35 minutes
- Cooling Time: 15-20 minutes
These times can vary based on your kitchen setup and experience, but this estimate gives you a solid framework.
Ingredients
- 2 cups all-purpose flour
- 1 ½ cups granulated sugar
- ¾ cup black cocoa powder
- 1 teaspoon baking soda
- ½ teaspoon baking powder
- ¼ teaspoon salt
- 1 cup buttermilk, at room temperature
- ½ cup vegetable oil
- 3 large eggs, at room temperature
- 1 tablespoon vanilla extract
- 1 teaspoon espresso powder (optional)
- 1 cup boiling water
For the Frosting:
- 1 cup unsalted butter, softened
- 4 cups powdered sugar
- ½ cup black cocoa powder
- ¼ cup heavy cream
- 1 teaspoon vanilla extract
Step-by-Step Instructions
Creating the Black Cocoa Cake is straightforward. Just follow these steps:
- Preheat the Oven: Preheat your oven to 350°F (175°C). Grease and flour two 9-inch round cake pans.
- Mix Dry Ingredients: In a large mixing bowl, sift together the flour, granulated sugar, black cocoa powder, baking soda, baking powder, and salt until well combined.
- Prepare Wet Ingredients: In another bowl, whisk together buttermilk, vegetable oil, eggs, vanilla extract, and espresso powder (if using) until smooth.
- Combine Mixtures: Gradually add the wet mixture into the dry ingredients, stirring until just combined.
- Add Boiling Water: Carefully stir in the boiling water. The batter will be thin, which is normal.
- Pour Batter: Divide the batter evenly between the prepared cake pans.
- Bake: Bake in the preheated oven for 30-35 minutes or until a toothpick inserted in the center comes out clean.
- Cool the Cakes: Once done, remove from the oven and allow the cakes to cool in the pans for about 15 minutes. Then, gently transfer them to wire racks to cool completely.
- Prepare the Frosting: In a mixing bowl, beat the softened butter until creamy. Gradually add powdered sugar and black cocoa powder, mixing until combined. Add heavy cream and vanilla extract, beating until light and fluffy.
- Assemble the Cake: Once the cakes are completely cooled, place one layer onto a serving platter. Spread a layer of frosting on top before adding the second layer. Frost the top and sides of the cake with the remaining frosting.
- Decorate: For an elegant touch, garnish with chocolate shavings or sprinkles if desired.
How to Serve
When it comes to serving your Black Cocoa Cake, presentation and pairing can elevate the experience. Here are some suggestions:
- Presentation: Serve on a cake stand to showcase its beautiful layers. Consider adding fresh fruit on the side for color and freshness.
- Accompaniments: Pair the cake with a scoop of vanilla ice cream, whipped cream, or a drizzle of chocolate sauce for an indulgent touch.
- Slice Size: Cut generous yet manageable slices to encourage guests to try a second serving without feeling overwhelmed.
- Beverage Pairing: Pair your cake with freshly brewed coffee, chai tea, or a sweet dessert wine to enhance the chocolate flavors beautifully.
- Add Décor: Use edible flowers or fresh mint leaves as decoration on your serving plates for an added touch of elegance.
By considering these serving tips, you’ll make sure that your Black Cocoa Cake is not just a dessert but also an unforgettable experience for every guest at your gathering!
Additional Tips
- Use High-Quality Ingredients: The flavor and texture of your Black Cocoa Cake significantly depend on the ingredients you use. Opt for premium black cocoa powder and fresh eggs for the best results.
- Measure Accurately: Baking is a science, so measure your ingredients carefully. Use a kitchen scale for more precise measurements, especially for flour and cocoa powder.
- Room Temperature Ingredients: Allow your ingredients, such as eggs and buttermilk, to come to room temperature before mixing. This creates a smoother batter and better texture.
- Don’t Overmix: When combining wet and dry ingredients, mix just until combined. Overmixing can lead to a dense cake.
- Test for Doneness: Use a toothpick inserted into the center of the cake to check doneness. It should come out clean or with a few moist crumbs attached.
- Resting Time: Allow the cake layers to cool completely before frosting. This helps the frosting to adhere better and prevents melting.
Recipe Variation
Feel free to get creative with your Black Cocoa Cake! Here are some variations to consider:
- Layered Chocolate Delight: Alternate layers of black cocoa cake with a contrasting flavor, such as a vanilla or raspberry cake for a marbled effect.
- Mocha Infusion: Add a tablespoon of coffee liqueur to the batter for an enhanced mocha flavor that pairs beautifully with chocolate.
- Nutty Crunch: Fold in some chopped walnuts or pecans into the batter for a delightful crunch and additional texture.
- Fruit Filling: Consider adding a layer of fruit filling, like cherry or raspberry, between the cake layers for a fruity contrast to the rich chocolate.
- Gluten-Free Option: Substitute the all-purpose flour for a gluten-free blend to cater to gluten-sensitive friends. Just ensure your baking powder is gluten-free as well.
Freezing and Storage
To keep your Black Cocoa Cake fresh and delicious for longer, follow these guidelines:
- Storage: After the cake is frosted, store it in an airtight container in the refrigerator. It should remain fresh for 4-5 days.
- Freezing: This cake freezes well. Wrap slices tightly in plastic wrap and then in aluminum foil to prevent freezer burn. It can last for up to 3 months in the freezer.
- Thawing: When ready to serve, thaw the frozen cake in the refrigerator overnight. This will retain moisture and flavor.
Special Equipment
To ensure your Black Cocoa Cake comes out perfectly, gather the following equipment:
- Mixing Bowls: Use different sizes for mixing dry and wet ingredients separately.
- Electric Mixer: A hand or stand mixer will make beating the butter and frosting much easier.
- Measuring Cups and Spoons: Accurate measurements are essential in baking.
- Cake Pans: Two 9-inch round cake pans are needed for this recipe.
- Cooling Racks: These help cool the cake evenly after baking.
- Spatula: For spreading frosting smoothly between and on top of the cake layers.
Frequently Asked Questions
How can I make my Black Cocoa Cake even more chocolatey?
You can increase the black cocoa powder slightly, but be careful not to alter the liquid ratios too much.
What’s the best way to store leftovers?
Wrap leftover cake tightly before placing it in the refrigerator to keep it from drying out.
Can I use other types of cocoa powder?
You can use regular unsweetened cocoa powder, but the flavor and color will differ significantly from black cocoa.
Why is my cake dense?
Dense cakes are often a result of overmixing the batter or measuring too much flour. Ensure you follow the instructions carefully for light and airy results.
How far in advance can I bake the cake?
You can bake the cake up to two days in advance. Store it appropriately and frost just before serving for the best taste and texture.
Conclusion
In conclusion, the Black Cocoa Cake is a delightful addition to any dessert table and will surely become a favorite among chocolate enthusiasts. With its rich flavor, moist texture, and visually stunning appearance, this cake is perfect for celebrations or just a sweet treat at home. Once you master this recipe, feel free to experiment with the variations, and don’t hesitate to share the joy of this decadent dessert with your friends and family!