Chili Cheese Fries: An Amazing Ultimate Recipe You Must Try
Chili cheese fries are a beloved comfort food that brings people together. This dish combines crispy fries, hearty chili, and gooey cheese into a mouthwatering experience that is hard to resist. The first bite of hot, melted cheese cascading over savory chili is nothing short of amazing. Whether you're craving a late-night snack or hosting a game-day party, chili cheese fries are an iconic choice that never disappoints.
The beauty of chili cheese fries lies in their versatility; you can customize them to suit your tastes. This incredible dish can be made with different types of cheese, various chili recipes, or even additional toppings like diced onions, jalapeños, or sour cream. If you've never tried making your own chili cheese fries, you're in for an unforgettable treat! In this article, you will discover why this recipe is a must-try, its preparation and cooking times, a list of simple ingredients, and easy step-by-step instructions that will have you serving up this fantastic dish in no time.
So, gear up as we dive into the world of chili cheese fries and uncover their delightful magic!
Why You'll Love This Recipe
Chili cheese fries are irresistible for several reasons that will have you coming back for more:
- Comfort Food Classic: There’s something wonderfully comforting about fries smothered in chili and cheese. It hits all the right notes!
- Customization: You can easily adapt this recipe to fit dietary preferences, whether by using vegetarian chili or vegan cheese.
- Crowd-Pleaser: This dish is a favorite at parties and gatherings. Everyone loves it!
- Quick and Simple: This recipe doesn't require advanced cooking skills, making it accessible for everyone.
- Flavor Explosion: The combination of spices from the chili, creaminess from the cheese, and the crunch of the fries creates a symphony of flavors.
- Perfect Pairing: Serve it with a cold drink for an unbeatable snack experience.
With these compelling reasons, it’s no wonder chili cheese fries have a special place in many hearts.
Preparation and Cooking Time
Making chili cheese fries is convenient and doesn’t take much time. Here’s a breakdown of the expected time required:
- Preparation Time: 15 minutes
- Cooking Time: 20 minutes
- Total Time: 35 minutes
This quick prep and cook time ensures you can satisfy your cravings without extensive waiting.
Ingredients
- 4 large russet potatoes (for fries)
- 1 tablespoon olive oil
- Salt and pepper, to taste
- 2 cups chili (your favorite recipe or canned)
- 2 cups shredded cheddar cheese
- 1/2 cup sour cream (optional)
- 1/4 cup chopped green onions (optional)
- Jalapeños, sliced (optional)
Step-by-Step Instructions
Follow these simple steps to create delicious chili cheese fries:
- Preheat Oven: Preheat your oven to 425°F (220°C).
- Prepare Potatoes: Wash and peel (optional) the russet potatoes. Cut them into thin strips to create fries.
- Season Fries: In a bowl, toss the potato strips with olive oil, salt, and pepper until well coated.
- Bake Fries: Spread the fries out on a baking sheet in a single layer. Bake for 25-30 minutes, turning halfway, until golden and crispy.
- Heat Chili: While the fries are baking, heat your chili in a saucepan over medium heat until warmed through.
- Add Cheese to Chili: Once the chili is heated, you can stir in a portion of the shredded cheddar cheese until melted.
- Combine Fries and Chili: Once the fries are ready, remove them from the oven and transfer them to a serving dish. Pour the chili and cheese mixture generously over the fries.
- Top with Remaining Cheese: Sprinkle the remaining shredded cheese over the chili-covered fries while still hot.
- Melt Cheese: Optional—place the loaded fries back in the oven for 5 minutes or until the cheese is melted.
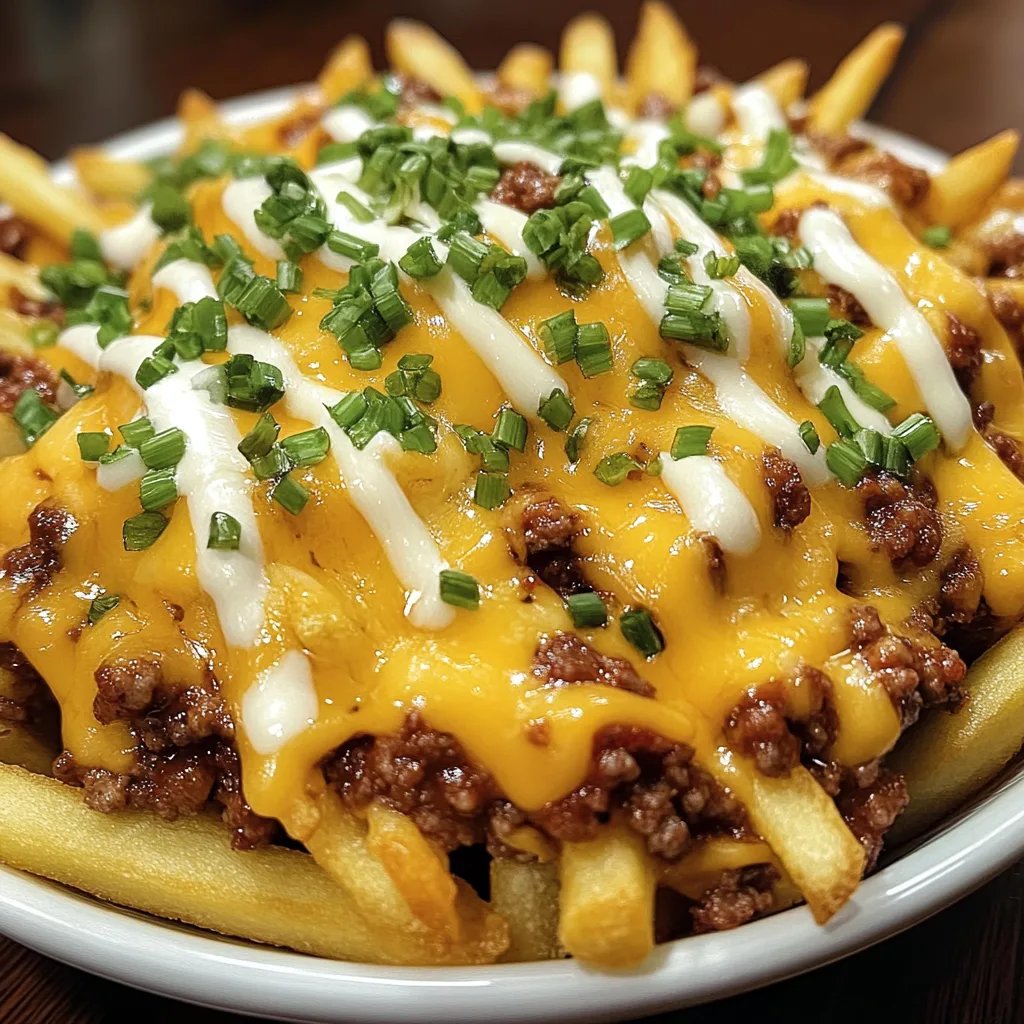
- Garnish: Top with sour cream, green onions, and jalapeños if desired.
Following these steps will ensure your chili cheese fries are perfect every time!
How to Serve
Presenting your chili cheese fries beautifully can elevate the whole dining experience. Here are some serving ideas:
- Serving Dish: Use a wide platter or individual bowls for a casual feel. It adds to the fun!
- Garnish with Fresh Ingredients: Fresh ingredients like diced green onions, jalapeños, or a dollop of sour cream make for attractive presentation.
- Accompaniments: Pair with drinks like soda, beer, or a spicy margarita to complement the flavors of the chili and cheese.
- Side Portions: Serve with extra bowls of toppings like hot sauce, more cheese, or salsa on the side for guests to customize their servings.
- Perfect Timing: Serve immediately after assembly while everything is warm and fresh for the best flavor.
With these tips, you’ll have an impressive and appetizing dish that everyone will love. Enjoy your chili cheese fries!
Additional Tips
- Use Fresh Ingredients: Fresh fries and homemade chili elevate the flavor and quality of your chili cheese fries.
- Experiment with Cheese: Try different kinds of cheese like Monterey Jack or pepper jack for an extra kick.
- Spice it Up: Add some chili powder or cayenne pepper to your chili for an extra layer of spice, turning your dish into a fiery delight.
- Double Up: Consider making a larger batch for parties. Chili cheese fries disappear quickly, so it’s wise to prepare more than you think you’ll need.
- Chill the Fries: For extra crispy fries, soak the cut potatoes in cold water for at least 30 minutes before baking.
Recipe Variation
Get creative with your ingredients! Here are some fun variations of chili cheese fries:
- Loaded Buffalo Chicken Fries: Top your chili cheese fries with shredded buffalo chicken, blue cheese crumbles, and a drizzle of ranch dressing.
- Taco Chili Cheese Fries: Substitute traditional chili with taco meat, and add toppings like diced tomatoes, guacamole, and shredded lettuce for a taco twist.
- Vegetarian Option: Use a hearty black bean or lentil chili as a base and top it with your favorite vegan cheese for a delicious vegetarian meal.
- BBQ Chili Cheese Fries: Swap traditional chili for a sweet and smoky BBQ pork or beef to give your dish a unique flavor profile.
Freezing and Storage
- Storage: Store leftover chili cheese fries in an airtight container in the refrigerator for up to 3 days. Reheat in the oven for best results.
- Freezing: You can freeze the fries and chili separately. Fries can be frozen for up to 2 months, while chili lasts about 3 months in the freezer. Make sure each is well-wrapped to avoid freezer burn.
Special Equipment
To successfully prepare your chili cheese fries, consider these helpful tools:
- Baking sheet
- Parchment paper for easy cleanup
- A sharp knife for cutting potatoes
- A mixing bowl for tossing fries
- Non-stick cooking spray for greasing the baking sheet
Frequently Asked Questions
Can I use frozen fries?
Absolutely! Frozen fries can save time and still yield delicious results when baked according to package instructions.
What type of chili works best?
It really depends on your preference. Feel free to use your favorite homemade recipe or a tasty canned chili for quick preparation.
Can I make this dish ahead of time?
While it's best enjoyed fresh, you can prepare the chili in advance and store it. Simply reheat before serving over fresh fries.
How do I make fries crispy in the oven?
Ensure they are spaced out on the baking sheet and avoid overcrowding. A light coat of oil helps crisp them up as well.
Can I serve this dish as a full meal?
Yes! Chili cheese fries make for a hearty meal, especially when topped with protein like chicken or beans.
Conclusion
Chili cheese fries are a delightful blend of flavors and textures that can be enjoyed by everyone. This versatile dish appeals to various tastes and occasions, making it perfect for casual gatherings or cozy nights in. With simple ingredients and straightforward steps, you can create a crowd-pleasing plate everyone will love. Unearth your inner chef and give this amazing recipe a try—you won't regret it!