Gluten-Free Hawaiian Rolls: An Amazing Ultimate Recipe
Gluten-Free Hawaiian Rolls are a delightful addition to any meal. These rolls are soft, fluffy, and just the right amount of sweet, perfect for a family dinner or a picnic. If you’re looking for an incredible bread recipe that caters to gluten-free diets, you’ve come to the right place. Hawaiian rolls, typically known for their light texture and slight sweetness, can be tricky when creating a gluten-free version. However, this recipe guarantees amazing results that everyone will love. With a few simple steps, you’ll be able to create mouthwatering rolls that even gluten-eaters won’t resist!
Imagine the joy and satisfaction of serving warm, freshly baked gluten-free rolls at your next gathering. As you pull them out of the oven, your kitchen will be filled with the sweet, comforting aroma of homemade bread. These rolls are versatile enough to be enjoyed with a main dish or as a standalone snack. Whether you’re hosting a holiday feast or a casual family meal, these Gluten-Free Hawaiian Rolls will surely impress your guests. Let’s explore why this recipe is a must-try for both gluten-free individuals and their friends and family alike.
Why You’ll Love This Recipe
Gluten-Free Hawaiian Rolls come with multiple benefits that make them a fantastic addition to any table. Here are a few reasons why this recipe stands out:
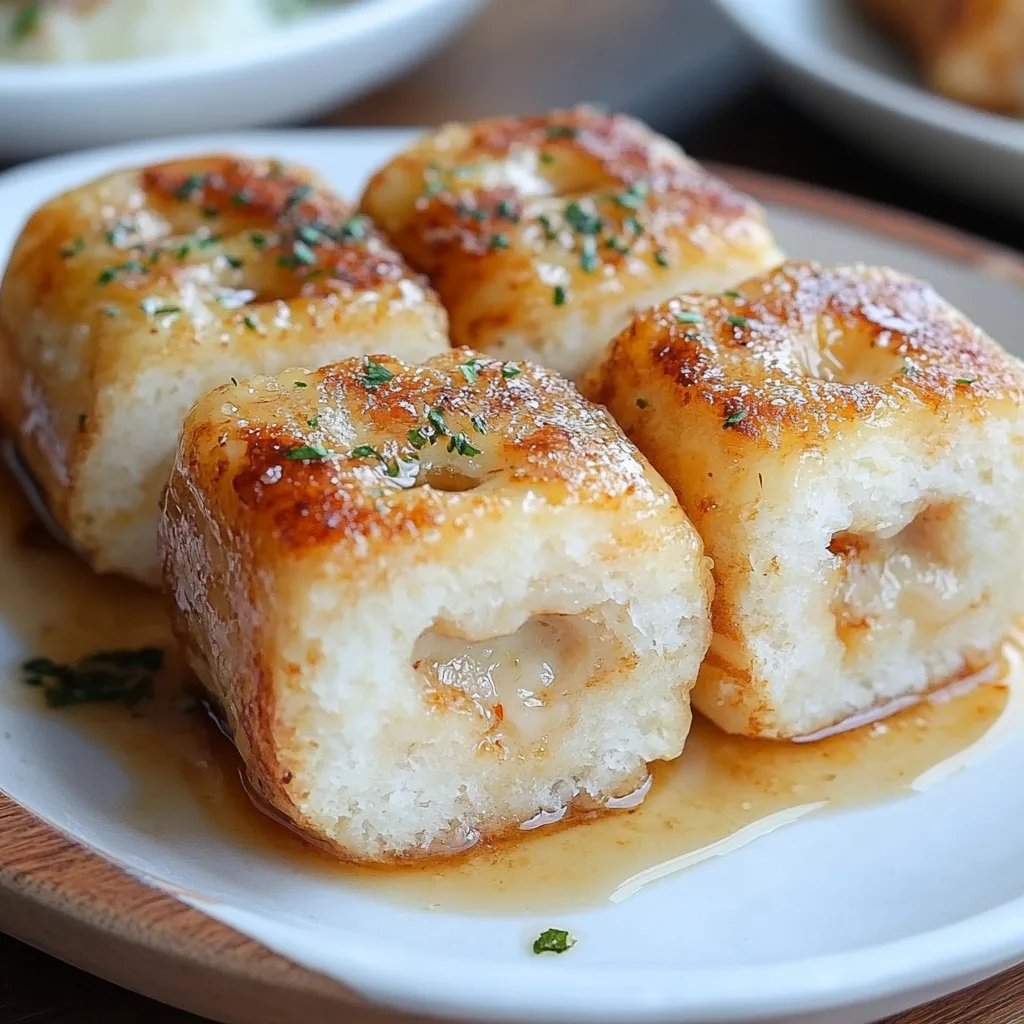
- Fluffy Texture: Achieving a light and airy consistency is crucial in any roll. This recipe takes care of that perfectly!
- Wonderful Sweetness: The slight sweetness of the rolls adds a delightful touch, making them perfect for pairing or enjoying on their own.
- Easy to Follow: You don’t need to be an expert baker to pull off these rolls. The straightforward steps make it accessible for anyone.
- Family-Friendly: Kids love these rolls, so you can please the entire family without anyone feeling left out.
- Perfect for Meal Prep: You can make these rolls ahead of time and freeze them for later use. They reheat beautifully!
- Gluten-Free: Ideal for anyone with gluten intolerance or celiac disease, ensuring no one misses out on the joy of fresh bread.
These attributes highlight exactly why you will fall in love with Gluten-Free Hawaiian Rolls. Each bite offers an amazing experience, blending flavor with the kind of texture that satisfies.
Preparation and Cooking Time
Creating your Gluten-Free Hawaiian Rolls is a time-efficient process. Here’s a quick breakdown of the preparation and cooking time:
- Preparation Time: 15 minutes
- Cooking Time: 20-25 minutes
- Rising Time: 1 hour
Overall, you can expect to spend approximately 1 hour and 40 minutes from start to finish, which includes the critical rising time that allows the dough to become fluffy and light.
Ingredients
- 2 cups gluten-free all-purpose flour
- 1/4 cup sugar
- 1 tablespoon instant yeast
- 1 teaspoon salt
- 1/2 cup milk (dairy or non-dairy)
- 1/2 cup pineapple juice
- 1/4 cup unsalted butter, melted
- 2 large eggs
- 1 teaspoon vanilla extract
- 1/2 teaspoon xanthan gum (if not included in your flour blend)
Step-by-Step Instructions
Follow these easy steps to create your Gluten-Free Hawaiian Rolls:
- Combine Dry Ingredients: In a large bowl, mix together the gluten-free flour, sugar, instant yeast, salt, and xanthan gum. Stir until combined.
- Warm the Liquids: In a separate bowl, heat the milk and pineapple juice until warm but not boiling. Add the melted butter, then let it cool slightly.
- Add Wet Ingredients: Pour the warm liquid mixture into the dry ingredients. Add the eggs and vanilla extract. Mix until a sticky dough forms.
- Knead the Dough: While you won’t knead it like traditional dough, mix the dough well in the bowl for about 5 minutes using a spatula or your hands.
- Let the Dough Rise: Cover the bowl with a clean cloth and let the dough rise in a warm area for about 1 hour or until it has doubled in size.
- Shape the Rolls: After the dough has risen, grease a baking dish. Scoop out small amounts of dough and shape them into small balls. Place them in the baking dish close together.
- Second Rise: Cover the rolls again with a cloth and let them rise for another 30 minutes.
- Preheat the Oven: Preheat your oven to 350°F (175°C).
- Bake: Once the rolls have completed their second rise, bake them in the preheated oven for 20-25 minutes, or until golden brown on top.
- Cool and Enjoy: Remove the rolls from the oven, let them cool slightly, and enjoy warm or at room temperature.
These steps make the creation of Gluten-Free Hawaiian Rolls straightforward and enjoyable, leading you toward a delicious result!
How to Serve
When it comes to serving your wonderful Gluten-Free Hawaiian Rolls, consider the following suggestions:
- Warm: Serve the rolls warm out of the oven for the best taste experience. The aroma alone will leave everyone eager to dig in!
- Butter and Honey: Spread a bit of butter or honey on top for extra sweetness. This classic combo brings out the Hawaiian flavor beautifully.
- Pair with Dishes: These rolls go wonderfully with savory dishes, so consider serving them alongside ham, roasted chicken, or stir-fried vegetables.
- Make Sliders: Use the rolls as a base for Hawaiian sliders. Fill them with ham, cheese, and pineapple for a delightful twist!
- Wrap in a Cloth: Keep them warm and fresh by wrapping them in a clean cloth after baking until you’re ready to serve.
By following these serving suggestions, you can ensure that your Gluten-Free Hawaiian Rolls make a striking impression at any meal!
Additional Tips
- Use Fresh Ingredients: Fresh eggs and high-quality dairy alternatives will enhance the flavor and texture of your rolls.
- Measure Flour Accurately: Use a spoon to scoop gluten-free flour and level it with a knife to avoid making your rolls dense.
- Experiment with Sweetness: Depending on your taste preference, feel free to adjust the sugar slightly to make the rolls sweeter or less so.
- Use Room Temperature Ingredients: Allow ingredients like eggs and milk to come to room temperature, as this can help create a smoother dough.
- Keep a Close Eye While Baking: Since ovens may vary, begin checking for doneness a few minutes before the recommended time.
Recipe Variation
Get creative! Here are some fun variations of the Gluten-Free Hawaiian Rolls:
- Coconut Flour Addition: Replace some of the gluten-free flour with coconut flour for a tropical twist. You may need to adjust the liquids slightly.
- Pineapple Coconut Rolls: Add crushed pineapple and shredded coconut into the dough for a burst of flavor that enhances the Hawaiian essence.
- Savory Herb Rolls: Incorporate herbs like rosemary or thyme into the dough for an aromatic, more savory roll that pairs well with savory dishes.
Freezing and Storage
- Storage: Keep the rolls stored in an airtight container at room temperature for up to 3 days. They can dry out if exposed to air.
- Freezing: For longer storage, freeze the rolls. Place them in a freezer-safe container or freezer bag, separating layers with parchment paper to prevent sticking. They can be stored for up to 3 months.
- Reheating: To enjoy frozen rolls, simply thaw at room temperature or pop them in the microwave for a few seconds. They regain their softness well.
Special Equipment
To ensure success with your Gluten-Free Hawaiian Rolls, consider having the following tools on hand:
- Mixing Bowls: Essential for combining ingredients.
- Whisk: Useful for blending the dry ingredients thoroughly.
- Spatula: A silicone spatula works great for mixing and scooping the dough.
- Baking Dish: A 9×13 inch dish is perfect for shaping and baking your rolls.
- Kitchen Towel: For covering the dough while it rises, keeping it warm and draft-free.
Frequently Asked Questions
Can I substitute the eggs in this recipe?
Yes, you can use flaxseed meal or a commercial egg replacer. Use 1 tablespoon of flaxseed meal mixed with 2.5 tablespoons of water for each egg.
What if my dough doesn’t rise?
Make sure your yeast is fresh and active. Also, ensure the liquid you added was warm, not hot, which can kill the yeast.
Can I make these rolls dairy-free?
Absolutely! Use non-dairy milk and replace the unsalted butter with a dairy-free alternative like coconut oil or margarine.
How can I enhance the sweetness?
Try incorporating honey or maple syrup instead of sugar for a natural sweetness while still remaining gluten-free.
Are there gluten-free flours you recommend?
A blend of gluten-free all-purpose flour with xanthan gum is ideal. Check for brands that specifically cater to baking for the best results.
Conclusion
Gluten-Free Hawaiian Rolls are not only a scrumptious addition to your meals but also cater to those with gluten sensitivities, ensuring no one feels left out during gatherings. This recipe boasts a simple yet fulfilling process that results in light, fluffy rolls that are bursting with flavor. The versatility of these rolls allows you to enjoy them with a variety of dishes, making them a staple worth mastering. With your newfound knowledge and detailed instructions, you'll be ready to impress family and friends alike with these delightful homemade gluten-free treats!