Whimsical Rainbow Birthday Cake: An Incredible 7-Layer Recipe
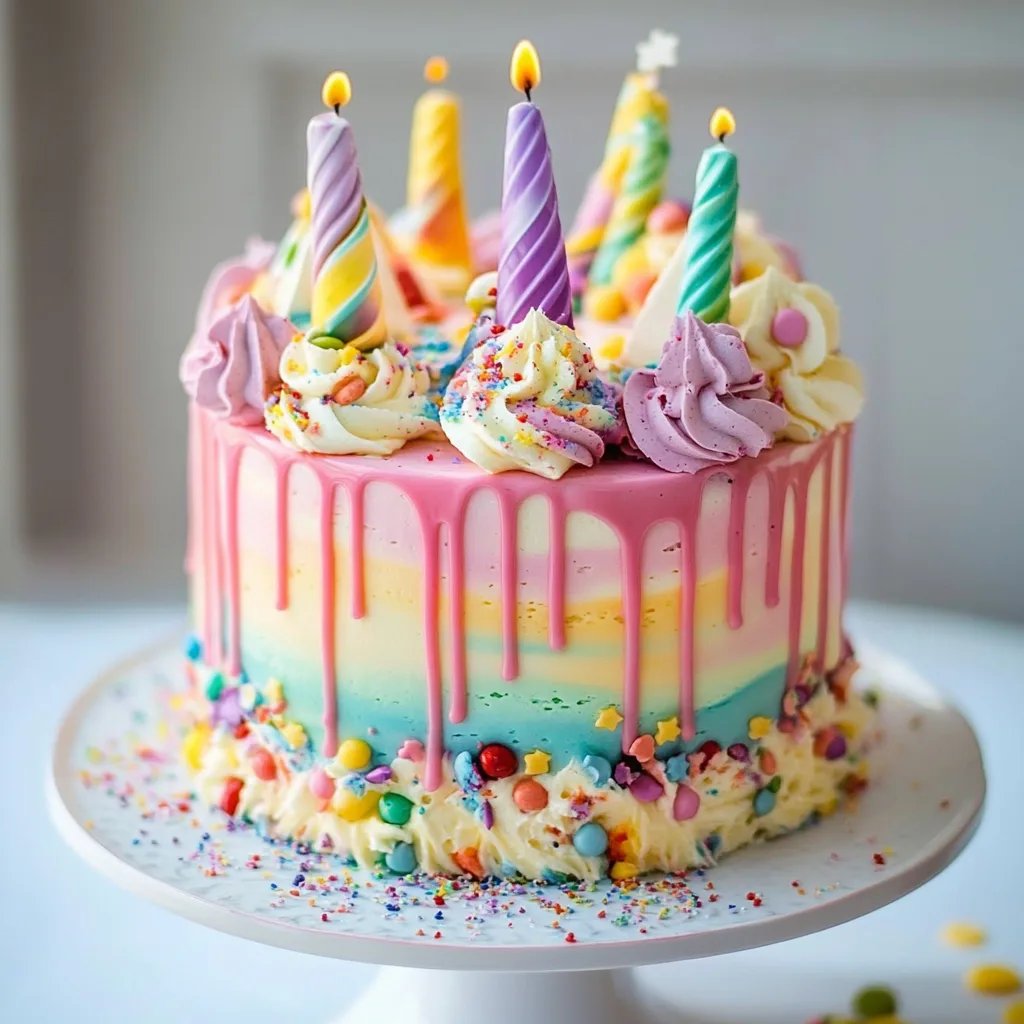
Whimsical Rainbow Birthday Cake is a vibrant and delightful celebration centerpiece. It stands out not only for its striking colors but also for its rich, delightful flavors. This cake is crafted to inspire joy and smiles, making it a fantastic choice for birthdays and festive occasions. Every slice reveals layers of beautiful, vivid hues that will capture the hearts of both children and adults alike. As you cut into this masterpiece, expect the excitement to fill the room as your guests marvel at its colorful interior.
Baking a Whimsical Rainbow Birthday Cake is an adventure in culinary creativity. The layers are not only a feast for the eyes but are packed with delicious, fluffy cake goodness. From fluffy vanilla or funfetti flavors to creamy buttercream, each layer can be uniquely flavored to match your preferences. The art of baking is as much about the experience as it is about the ingredients and techniques. Therefore, this guide will walk you through everything, making the process enjoyable and rewarding.
If you’ve ever dreamed of bringing a slice of rainbow into your celebrations, this is your chance! The cake’s visual appeal combined with its amazing taste will surely be the highlight of any party. Let’s dive deep into what makes this Whimsical Rainbow Birthday Cake an incredible creation that everyone will love.
Why You’ll Love This Recipe
There are numerous reasons why the Whimsical Rainbow Birthday Cake wins hearts at any gathering. Here are a few compelling reasons to get excited about this recipe:
- Stunning Visuals: The multi-layered cake is a feast for the eyes. Its colorful layers create an unforgettable presentation.
- Creative Freedom: You can customize colors and flavors to match any theme or preference. The possibilities are endless!
- Fun for All Ages: Kids will love the vibrant colors, while adults will appreciate the delicious flavors.
- Great for Celebrations: It's perfect for birthdays, anniversaries, or any joyous event.
- Shareable: The size creates many slices, making it perfect for larger gatherings. You’ll want to share this beauty!
With these points in mind, you’ll see why this cake captures the spirit of celebration. You’re sure to create memories with every slice enjoyed!
Preparation and Cooking Time
Baking the Whimsical Rainbow Birthday Cake requires some time, but the results are well worth the effort. Here’s a breakdown of the time commitment involved:
- Preparation Time: 30 minutes
- Cooking Time: 30-35 minutes
- Cooling Time: 1 hour
- Assembly Time: 30 minutes
In total, you’re looking at around 2 to 2.5 hours. Setting aside this time ensures a stress-free baking process.
Ingredients
- 3 ½ cups all-purpose flour
- 2 ½ cups granulated sugar
- 1 tablespoon baking powder
- ½ teaspoon salt
- 2 cups whole milk
- 1 cup unsalted butter, softened
- 4 large eggs
- 2 teaspoons vanilla extract
- Food coloring (red, orange, yellow, green, blue, and purple)
- 4 cups buttercream frosting (homemade or store-bought)
- Rainbow sprinkles (for decoration)
Step-by-Step Instructions
Creating your own Whimsical Rainbow Birthday Cake can be simple when you follow these steps:
- Preheat: Preheat your oven to 350°F (175°C). Grease and flour six 8-inch round cake pans.
- Mix Dry Ingredients: In a large bowl, whisk together the flour, baking powder, and salt.
- Cream Butter and Sugar: In another bowl, beat together the butter and granulated sugar until light and fluffy.
- Add Eggs: Add eggs one at a time, mixing well after each addition. Then stir in the vanilla extract.
- Combine Mixtures: Gradually add the dry ingredients to the wet ingredients, alternating with milk. Mix until just combined.
- Divide Batter: Divide the batter equally into six bowls, roughly 1 ¼ cups in each.
- Color the Batter: Add a few drops of food coloring to each bowl, mixing until you achieve your desired colors: red, orange, yellow, green, blue, and purple.
- Pour into Pans: Pour each colored batter into the prepared pans, smoothing the tops with a spatula.
- Bake: Bake for 30-35 minutes or until a toothpick inserted in the center comes out clean.
- Cool: Allow the cakes to cool in the pans for 10 minutes. Then transfer to wire racks to cool completely.
- Level the Cakes: Once fully cooled, use a serrated knife to level off the tops of each cake if needed.
- Frosting Layer: Place the purple layer on a serving plate or cake stand. Spread a layer of buttercream frosting on top.
- Stack Layers: Add the blue layer next and repeat the frosting process for each colored layer.
- Frost the Entire Cake: Once all layers are assembled, use the remaining buttercream frosting to frost the sides and top of the entire cake.
- Decorate: Top your cake with rainbow sprinkles or any other decorative elements you prefer.
By following these steps, you create a visually stunning and delicious Whimsical Rainbow Birthday Cake that will impress!
How to Serve
To enjoy the Whimsical Rainbow Birthday Cake to its fullest, consider these serving tips:
- Slice with Care: Use a sharp knife warmed under hot water for clean cuts. This helps maintain the beautiful layers.
- Garnishing: Consider adding fresh fruit or whipped cream on the side. Their lightness can balance the sweetness of the cake.
- Pairing Beverages: Serve with milk, fruit juices, or a light sparkling wine for adults. These beverages complement the cake flavors well.
- Themed Plates: Using colorful plates can enhance the joyful appearance of the cake at the party.
- Storage Tips: If there’s any leftover cake, store it covered at room temperature for up to 3 days, or in the refrigerator for a week.
Emphasizing presentation and thoughtful serving will make your Whimsical Rainbow Birthday Cake even more memorable for everyone at your celebration!
Additional Tips
- Use Quality Ingredients: To enhance flavor, opt for high-quality vanilla extract and fresh eggs for the batter.
- Room Temperature Ingredients: Ensure your butter and eggs are at room temperature; this helps create a lighter texture.
- Chill the Cake Before Frosting: After assembling, refrigerate the cake for about 30 minutes before frosting. This helps the layers set and makes frosting easier.
- Experiment with Decorations: Aside from rainbow sprinkles, consider adding edible glitter, fondant decorations, or fresh fruit for added flair.
- Customize for Seasons: Use seasonal colors or themes for holidays. For example, reds and greens for Christmas, or pastels for Easter.
Recipe Variation
Don't hesitate to showcase your creativity! Here are a few fun variations you can try:
- Flavored Cake Options: Instead of traditional vanilla, experiment with chocolate, almond, or lemon-flavored cake.
- Different Fillings: Add a layer of fruit preserves or curd between layers for an unexpected burst of flavor.
- Cocoa Powder Addition: Incorporate cocoa powder into one or more layers for a delightful chocolate surprise.
- Mini Versions: Make smaller, stacked mini rainbow cakes for individual servings or party favors.
Freezing and Storage
Proper storage ensures your cake remains delicious for longer. Here’s how:
- Storage: Keep leftover cake covered at room temperature for up to three days. If it's particularly warm, it may fare better in the fridge for up to a week.
- Freezing: Wrap slices tightly in plastic wrap and then in aluminum foil. They can be frozen for up to three months. Thaw overnight in the refrigerator before serving.
Special Equipment
Gather these necessary tools to help make the process seamless:
- Mixing Bowls: Various sizes for mixing ingredients and colors.
- Electric Mixer: A stand or hand mixer speeds up the creaming process.
- Cake Pans: Six 8-inch round pans for perfect layering.
- Offset Spatula: For spreading frosting evenly and smoothly.
- Cooling Racks: To allow cakes to cool evenly after baking.
- Serrated Knife: To level off the tops of cakes for a neat finish.
Frequently Asked Questions
How can I prevent the colors from mixing together when layering?
Work swiftly to layer each cake, and use a spatula to carefully spread frosting on each layer before adding the next.
What can I do if my cake layers are domed?
If the tops of your cakes dome significantly during baking, use a serrated knife to trim them flat before frosting.
Can I use a different frosting type?
Certainly! Cream cheese frosting, ganache, or whipped cream can add a different taste and texture.
Is there a gluten-free option?
Yes! Substitute all-purpose flour with a gluten-free blend, ensuring your baking powder is also gluten-free.
How can I make the cake dairy-free?
Use plant-based milk and replace the butter with a dairy-free alternative. Check the frosting for similar substitutes.
Conclusion
Creating the Whimsical Rainbow Birthday Cake can be a delightful adventure in baking and celebration. This visually stunning cake not only appeals to the eyes but also tantalizes the taste buds. With its many layers and customizable flavors, it caters to every guest at your gathering. Benefit from the tips and variations offered in this article to make your version truly unique. Dive into this experience with joy, and watch as your rainbow masterpiece brings smiles and happiness to the celebration!