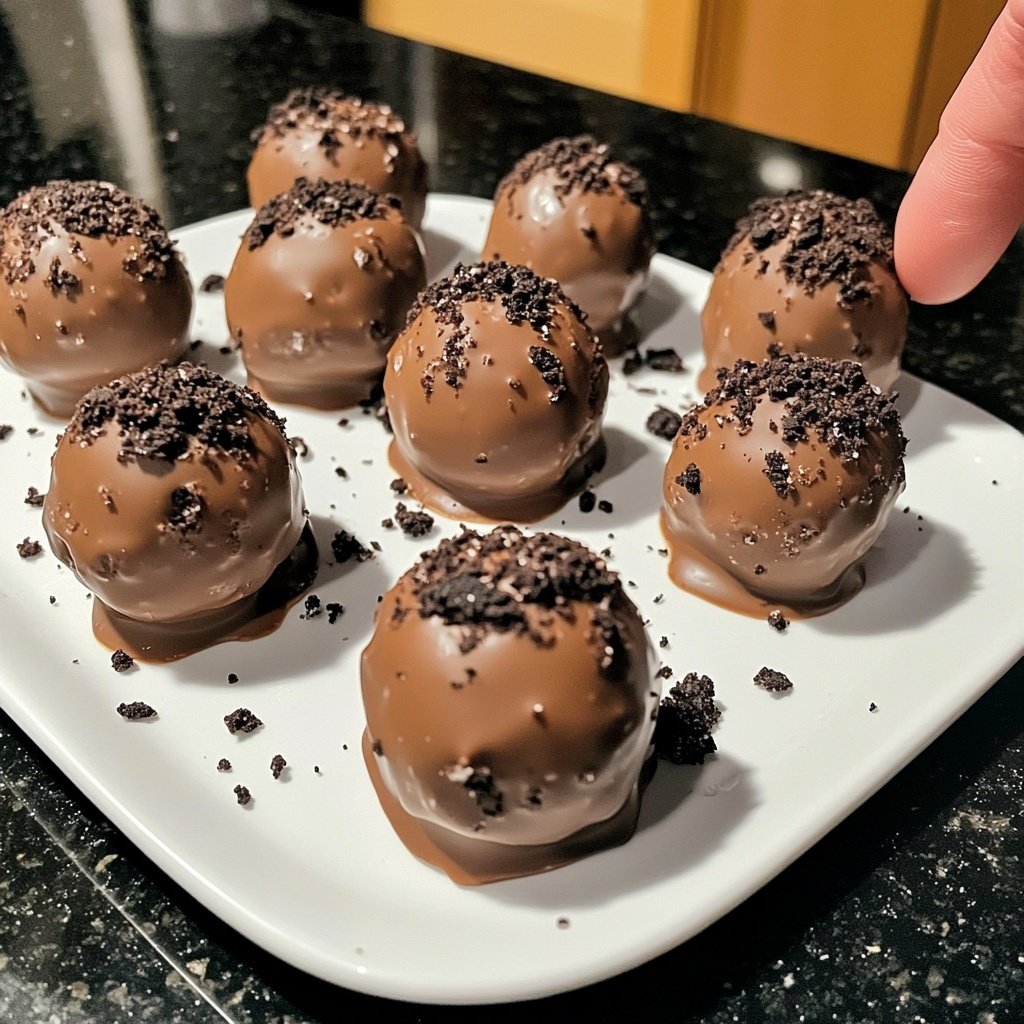
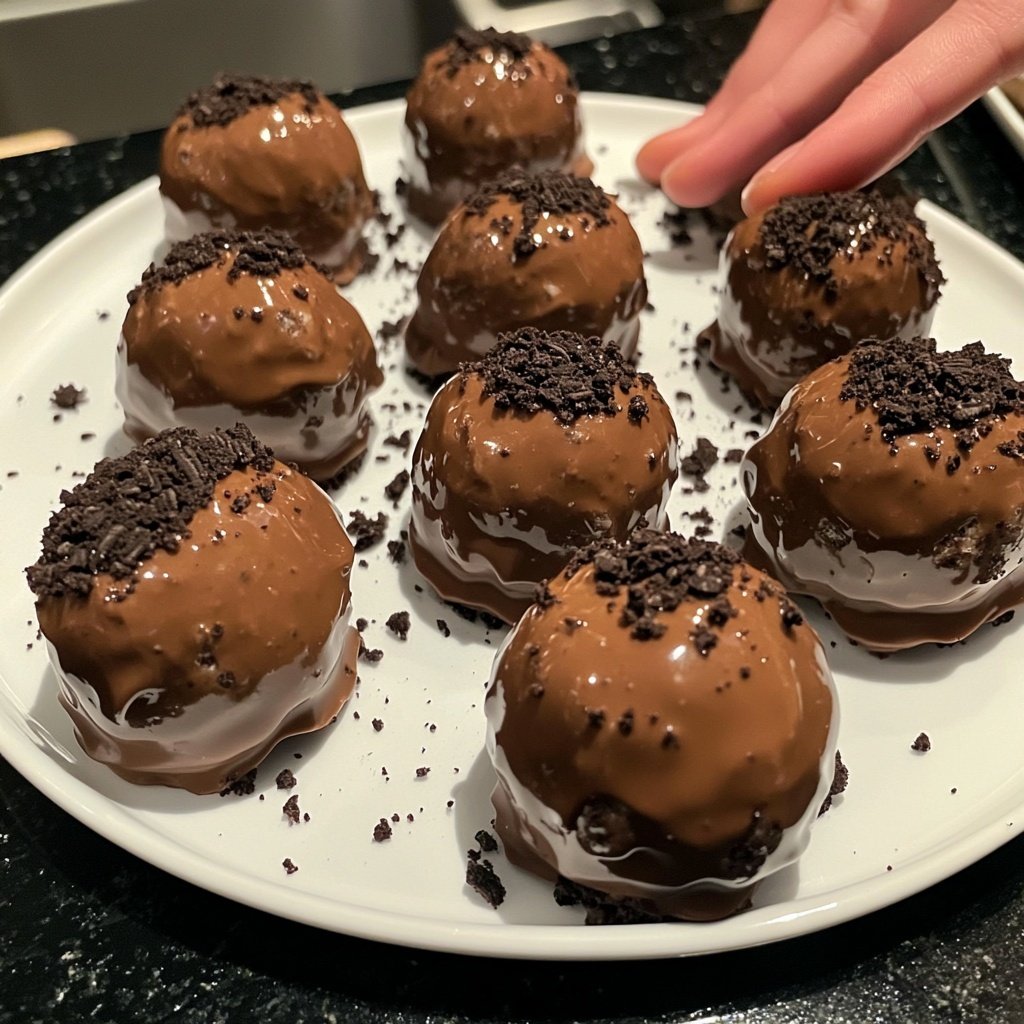
3-Ingredient No-Bake Oreo Balls
Highlighted under: Homemade Sweets Recipes
These delicious 3-Ingredient No-Bake Oreo Balls are the perfect sweet treat that requires no oven and minimal effort.
These 3-Ingredient No-Bake Oreo Balls are a delightful treat that combines the classic taste of Oreos with cream cheese and chocolate. Perfect for parties, gatherings, or just a sweet indulgence at home!
Why You Will Love This Recipe
- Rich chocolate flavor paired with creamy cream cheese
- No baking required—quick and easy to make
- Perfect for sharing, or keeping all to yourself!
The Magic of No-Bake Desserts
No-bake desserts are a game changer for anyone who enjoys sweet treats but wants to avoid the hassle of traditional baking. These desserts are often quicker to prepare, requiring no oven time, which makes them perfect for warm weather or last-minute gatherings. With just a few ingredients, you can create a deliciously indulgent treat that will impress your family and friends. Plus, they can be made in advance, allowing you to enjoy more time with your guests.
What makes no-bake desserts stand out is their versatility. You can easily customize them to suit your taste preferences or dietary restrictions. Whether you want to swap out the chocolate coating for a white chocolate drizzle or add different toppings like crushed nuts or sprinkles, the options are endless. This adaptability not only makes the dessert-making process more exciting but also ensures that everyone can enjoy a treat that caters to their unique tastes.
Perfect for Any Occasion
These 3-Ingredient No-Bake Oreo Balls are ideal for a variety of occasions. Whether you’re planning a birthday party, a holiday gathering, or simply need a sweet snack to enjoy at home, these treats fit the bill perfectly. They can be easily transported, making them a great option for potlucks or picnics. Their bite-sized nature allows guests to enjoy them without the need for plates or utensils, making cleanup a breeze.
Moreover, their rich chocolate flavor and creamy texture make them a hit with both kids and adults alike. You can even personalize them for specific celebrations by using colored chocolate melts or themed decorations. Imagine serving these Oreo balls at a Halloween party with orange and black sprinkles or at a wedding with elegant white chocolate and gold dusting. The possibilities are as endless as your creativity!
Storage and Shelf Life
One of the best aspects of these Oreo balls is their storage capabilities. Once prepared, they can be stored in an airtight container in the refrigerator for up to a week, maintaining their delicious flavor and texture. This makes them a fantastic option for meal prep or for those who like to have a sweet treat on hand. Just make sure to separate layers with parchment paper to prevent sticking.
If you find yourself with a large batch or simply want to enjoy them later, these Oreo balls can also be frozen. Place them in a single layer on a baking sheet until frozen solid, then transfer them to a freezer-safe container or bag. They can be kept in the freezer for up to three months. When you’re ready to enjoy, simply let them thaw in the refrigerator for a few hours, and they’ll be just as delightful as the day you made them.
Ingredients
Gather the following ingredients to make these delicious Oreo balls:
Ingredients
- 1 package of Oreo cookies (about 15.25 oz)
- 8 oz cream cheese, softened
- 12 oz chocolate (milk or dark) for coating
Make sure to have everything ready before you start!
Instructions
Follow these simple steps to create your Oreo Balls:
Crush the Oreos
In a food processor, crush the Oreo cookies until they are fine crumbs.
Mix with Cream Cheese
In a mixing bowl, combine the crushed Oreos with softened cream cheese. Mix until well combined.
Form the Balls
Using your hands, roll the mixture into small balls, about 1 inch in diameter.
Chill the Balls
Place the balls on a parchment-lined baking sheet and refrigerate for about 30 minutes to firm up.
Coat with Chocolate
While the balls are chilling, melt the chocolate in a microwave-safe bowl. Dip each ball in the melted chocolate, ensuring it is fully coated, then return to the baking sheet.
Set and Serve
Let the chocolate set at room temperature, or refrigerate for faster setting. Enjoy your delicious Oreo balls!
Once set, these Oreo balls are ready to be enjoyed!
Pro Tips
- For added decoration, consider drizzling some extra melted chocolate on top of the Oreo balls or sprinkling crushed Oreos for a nice finish.
Tips for Success
To ensure your Oreo balls come out perfectly, it’s crucial to use softened cream cheese. This will allow for easier mixing and a smoother texture. If your cream cheese is too cold, you may end up with lumps in your mixture, which can affect the final result. Simply leave it out at room temperature for 30 minutes before starting your recipe.
When melting the chocolate, be careful not to overheat it. Use short bursts of heat in the microwave, stirring in between, until the chocolate is just melted. Overheated chocolate can seize up and become grainy, making it difficult to coat your Oreo balls smoothly. If you find your chocolate is too thick for dipping, you can thicken it by adding a small amount of vegetable oil.
Flavor Variations
While the classic Oreo ball recipe is undeniably delicious, there are plenty of ways to mix things up. For a fun twist, consider using different flavored Oreos, such as mint or peanut butter. These variations can add a unique spin on the traditional recipe, delighting those who are familiar with the original flavor while enticing new taste buds.
You can also enhance the flavor by adding ingredients like vanilla extract or a pinch of sea salt to the cream cheese mixture. Adding a layer of crushed nuts or sprinkles before the chocolate sets can provide a delightful crunch and visual appeal. Experimenting with different flavors and add-ins allows you to create your own signature Oreo ball recipe that reflects your personal style.
Questions About Recipes
→ Can I use different flavors of Oreos?
Absolutely! You can use any flavor of Oreos, such as peanut butter or mint, to create a unique twist.
→ How long do these Oreo balls last?
They can be stored in an airtight container in the refrigerator for up to a week.
→ Can I freeze these Oreo balls?
Yes, you can freeze them! Just place them in a single layer in an airtight container for up to 3 months.
→ What can I use instead of cream cheese?
You can substitute cream cheese with mascarpone or a dairy-free cream cheese for a different flavor profile.
3-Ingredient No-Bake Oreo Balls
Created by: The Ultimaterecipehub Team
Recipe Type: Homemade Sweets Recipes
Skill Level: Beginner
Final Quantity: 24 balls
What You'll Need
Ingredients
- 1 package of Oreo cookies (about 15.25 oz)
- 8 oz cream cheese, softened
- 12 oz chocolate (milk or dark) for coating
How-To Steps
In a food processor, crush the Oreo cookies until they are fine crumbs.
In a mixing bowl, combine the crushed Oreos with softened cream cheese. Mix until well combined.
Using your hands, roll the mixture into small balls, about 1 inch in diameter.
Place the balls on a parchment-lined baking sheet and refrigerate for about 30 minutes to firm up.
While the balls are chilling, melt the chocolate in a microwave-safe bowl. Dip each ball in the melted chocolate, ensuring it is fully coated, then return to the baking sheet.
Let the chocolate set at room temperature, or refrigerate for faster setting. Enjoy your delicious Oreo balls!
Extra Tips
- For added decoration, consider drizzling some extra melted chocolate on top of the Oreo balls or sprinkling crushed Oreos for a nice finish.
Nutritional Breakdown (Per Serving)
- Calories: 120 kcal
- Total Fat: 8g
- Saturated Fat: 5g
- Cholesterol: 15mg
- Sodium: 50mg
- Total Carbohydrates: 12g
- Dietary Fiber: 0g
- Sugars: 9g
- Protein: 1g